Geoid Models
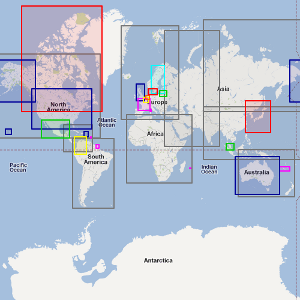 Download Geoid Model from World MapClick above to access the World Map and download the latest Geoid Model available for your area
 Download Australian Geoid Model AUSGeo09Click above to download and install the vertical shift file for Australian Geoid Model AUSGeo09
 Download Belgium Geoid Model hBG03Click above to download and install the vertical shift file for Belgium Geoid Model hBG03
 Download Canadian Geoid Model GSD95Click above to download and install the vertical shift file for Canadian Geoid Model GSD95
- Download Canadian Geoid Model HT1Click above to download and install the vertical shift file for Canadian Geoid Model HT1
- Download Canadian Geoid Model HT2Click above to download and install the vertical shift file for Canadian Geoid Model HT2
- Download Canadian Geoid Model CGG2013 (NAD83)Click above to download and install the vertical shift file for Canadian Geoid Model CGG2013
 Download Columbian Geoid Model GEOCOL04Click above to download and install the vertical shift file for Columbian Geoid Model GEOCOL04
 Download Denmark Geoid Model DVR90Click above to download and install the vertical shift file for Denmark Geoid Model DVR90
 Download French Geoid Model RAF98Click above to download and install the vertical shift file for French Geoid Model RAF98
- Download French Geoid Model RAF09Click above to download and install the vertical shift file for French Geoid Model RAF09
- Download French Geoid Model GGF97 for CorsicaClick above to download and install the vertical shift file for French Geoid Model GGF97 for Corsica
- Download French Geoid Model RAC09 for CorsicaClick above to download and install the vertical shift file for French Geoid Model RAC09 for Corsica
- Download French Geoid Model GGGUY00 for GuyaneClick above to download and install the vertical shift file for French Geoid Model GGGUY00 for Guyane
- Download French Geoid Model GGM00 for MartiniqueClick above to download and install the vertical shift file for French Geoid Model GGM00 for Martinique
- Download French Geoid Model GGR99 for ReunionClick above to download and install the vertical shift file for French Geoid Model GGR99 for Reunion Island
- Download French Geoid Model RANC08 for New CaledoniaClick above to download and install the vertical shift file for French Geoid Model RANC08 for New Caledonia
 Download Geoid Model OSGM02 for the Republic of IrelandClick above to download and install the vertical shift file for Irish Geoid Model OSGM02
 Download Japan Geoid Model GSIGEO00Click above to download and install the vertical shift file for Japan Geoid Model GSIGEO00
(Terms of use) Download Lithuanian Geoid Model KvazigeoClick above to download and install the vertical shift file for Lithuanian Geoid Model Kvazigeo
 Download Malaysian Geoid Model WGeoid04Click above to download and install the vertical shift file for Malaysian Geoid Model WGeoid04
 Download Mexican Geoid Model GGM06Click above to download and install the vertical shift file for Mexican Geoid Model GGM06
 Download Netherlands Geoid Model NAPClick above to download and install the vertical shift file for Netherlands Geoid Model NAP
- Download Netherlands Geoid Model for North SeaClick above to download and install the vertical shift file for Netherlands Geoid Model for North Sea
- Download Netherlands Geoid Model NAP2004Click above to download and install the vertical shift file for Netherlands Geoid Model NAP2004
- Download Netherlands Geoid Model NAP2008Click above to download and install the vertical shift file for Netherlands Geoid Model NAP2008
 Download PL-geoid-2011 for PolandClick above to download and install the vertical shift file for Polish Geoid Model PL-geoid-2011
 Download South African Geoid Model SA2010Click above to download and install the vertical shift file for South African Geoid Model SA2010
 Download Swedish Geoid Model SWEN01LClick above to download and install the vertical shift file for Swedish Geoid Model SWEN01L
- Download Swedish Geoid Model SWEN08 RH70Click above to download and install the vertical shift file for Swedish Geoid Model SWEN08 RH70
- Download Swedish Geoid Model SWEN08 RH2000Click above to download and install the vertical shift file for Swedish Geoid Model SWEN08 RH2000
.png) Download Geoid Model OSGM02 for Great BritainClick above to download and install the vertical shift file for Geoid Model OSGM02 for Great Britain
Download Geoid Model OSGM02 for Great BritainClick above to download and install the vertical shift file for Geoid Model OSGM02 for Great Britain- Download Geoid Model OSGM02 for Northern IrelandClick above to download and install the vertical shift file for Geoid Model OSGM02 for Northern Ireland
.png) Download Geoid Model Geoids03 for coterminous U.S.Click above to download and install the vertical shift file for Geoid Model Geoids03 for coterminous U.S.
Download Geoid Model Geoids03 for coterminous U.S.Click above to download and install the vertical shift file for Geoid Model Geoids03 for coterminous U.S.- Download Geoid Model Geoids09 for coterminous U.S.Click above to download and install the vertical shift file for Geoid Model Geoids09 for coterminous U.S.
- Download Geoid Model Geoids12A for coterminous U.S.Click above to download and install the vertical shift file for Geoid Model Geoids12A for coterminous U.S.
- Download Geoid Model Geoids18 for coterminous U.S.Click above to download and install the vertical shift file for Geoid Model Geoids18 for coterminous U.S.
- Download Geoid Model Alaska06 for AlaskaClick above to download and install the vertical shift file for Geoid Model Alaska06 for Alaska
- Download Geoid Model Alaska09 for AlaskaClick above to download and install the vertical shift file for Geoid Model Alaska09 for Alaska
- Download Geoid Model Alaska12A for AlaskaClick above to download and install the vertical shift file for Geoid Model Alaska12A for Alaska
- Download Geoid Model Alaska12B for AlaskaClick above to download and install the vertical shift file for Geoid Model Alaska12B for Alaska
- Download Geoid Model Hawaii99 for HawaiiClick above to download and install the vertical shift file for Geoid Model Hawaii99 for Hawaii
- Download Geoid Model EGM2008 extraction for HawaiiClick above to download and install the vertical shift file for Geoid Model EGM2008 high resolution extraction for Hawaii
- Download Geoid Model Hawaii12A for HawaiiClick above to download and install the vertical shift file for Geoid Model Hawaii12A for Hawaii
- Download Geoid Model Hawaii12B for HawaiiClick above to download and install the vertical shift file for Geoid Model Hawaii12B for Hawaii
- Download Geoid Model PRVI99 for Puerto Rico & Virgin IslandsClick above to download and install the vertical shift file for Geoid Model PRVI99 for Puerto Rico & Virgin Islands
- Download Geoid Model PRVI18 for Puerto Rico & Virgin IslandsClick above to download and install the vertical shift file for Geoid Model PRVI18 for Puerto Rico & Virgin Islands
 Download World Geoid Model EGM96Click above to download and install the vertical shift file for World Geoid Model EGM96
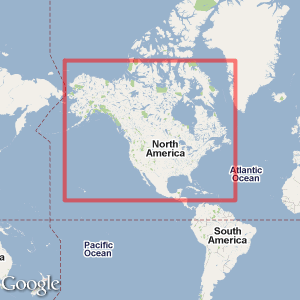 Download EGM2008 extraction for North America (1 x 1 Minute)Click above to download and install the vertical shift file for EGM2008 high resolution extraction for North America
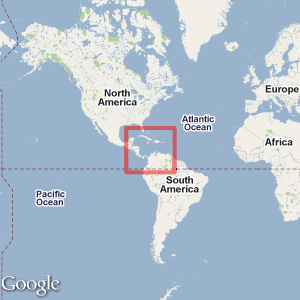
- Download EGM2008 extraction for Central America (1 x 1 Minute)Click above to download and install the vertical shift file for EGM2008 high resolution extraction for Central America
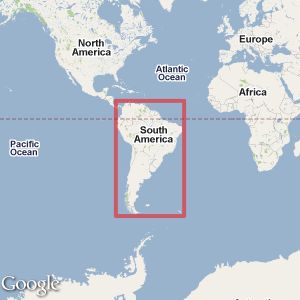
- Download EGM2008 extraction for South America (1 x 1 Minute)Click above to download and install the vertical shift file for EGM2008 high resolution extraction for South America
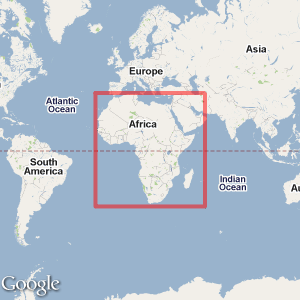
- Download EGM2008 extraction for Africa (1 x 1 Minute)Click above to download and install the vertical shift file for EGM2008 high resolution extraction for Africa
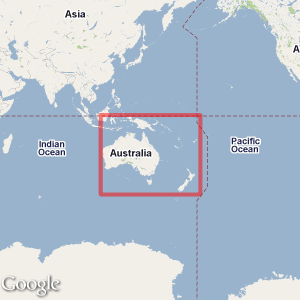
- Download EGM2008 extraction for Australia (1 x 1 Minute)Click above to download and install the vertical shift file for EGM2008 high resolution extraction for Australia
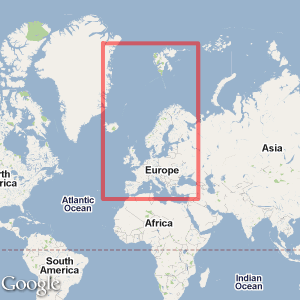
- Download EGM2008 extraction for Europe (1 x 1 Minute)Click above to download and install the vertical shift file for EGM2008 high resolution extraction for Europe

- Download EGM2008 extraction for Western Asia (1 x 1 Minute)Click above to download and install the vertical shift file for EGM2008 high resolution extraction for Western Asia
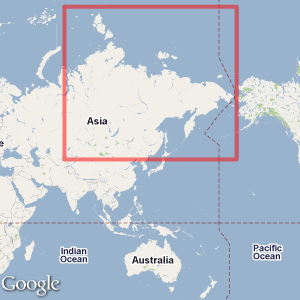
- Download EGM2008 extraction for North Eastern Asia (1 x 1 Minute)Click above to download and install the vertical shift file for EGM2008 high resolution extraction for Eastern Asia
- Download EGM2008 extraction for South Eastern Asia (1 x 1 Minute)Click above to download and install the vertical shift file for EGM2008 high resolution extraction for Eastern Asia
Geoid Tools
 Extract ToolClick above to download and install Geoids Extract Tool for Windows.
This tool will allow Geoid model display, extraction and conversion to FAST Survey format.
Help
When is the Extract Tool Needed?
. When using ProMark Field or MobileMapper Field (optional). The Extract tool may be used to crop a geoid to the sole area needed in your application, thus reducing the size of the geoid file you need to download to your receiver. The use of the Extract tool is optional in this case as complete geoids may be downloaded to the receiver without any risk of going low in memory.
. When using FAST Survey (mandatory). In addition to having the capability to crop a geoid, the Extract tool may be used to convert a geoid file into a GSF file. GSF being the only geoid format supported by FAST Survey, using the Extract tool as a file converter is therefore a mandatory step before you can use a geoid in FAST Survey.
Installing the Extract Tool on your Computer
. Click on the Extract Tool link located above. You are then prompted to save the Install_Geoids.exe file on your computer
. Click Save File and wait until the download is complete.
. Run Install_Geoids.exe on your computer. Follow the instructions on the screen to complete the installation. Click on the Close button once complete.
Downloading a Geoid to your Computer and Receiver
. On the web page, choose a geoid and click on the corresponding link. You are then prompted to save the Install_<Geoid_Name>.exe or .msi file on your computer.
. Click Save File and wait until the download is complete.
. Run the Install_<Geoid_Name>.exe or .msi file on your computer. Follow the instructions on the screen to complete the installation.
If a receiver is currently connected to the computer via ActiveSync, instructions will also be provided to install the geoid file on the receiver as well (in \Program Files\Geoids Data\).
If no receiver is connected, the geoid (a *.geo file) is installed on the computer only (path: <Drive:>/Program Files (x86)/Common Files/Ashtech/Geoids/). Installation on the receiver will however be automatic next time you connect it to the computer.
. After the geoid has been installed on the receiver, it is ready for use in ProMark Field and MobileMapper Field software.
NOTE: If the selected geoid is for use in FAST Survey, and/or you wish to limit the extent of the geoid before installing it on the receiver, tap "No" on the receiver screen when the automatic install procedure prompts you to install the selected geoid on the receiver.
Cropping a Geoid - Installing a Cropped Geoid
This function refers to the capability of the software to adjust the extent of a geoid file to a given rectangular area, corresponding to your working area.
. From the computer's task bar, select Start>All Programs>Ashtech> Geoids.
. Select File>Open. The program opens directly the folder containing all the downloaded geoids.
. Choose one and click Open. The program provides a graphic representation of the geoid. Thin lines are superimposed so you can recognize the geographical area covered by the geoid and choose which section of the area you would like to use in your project.
. Using the mouse, draw a rectangle around the desired section.
. Select File>Save Selection, name the section of geoid and click Save. By default, the resulting file is also a "geo" file, saved to the same folder on the computer.
. Copy the resulting file to the \Program Files\Geoids Data\ folder on the receiver, using Microsoft ActiveSync.
Preparing a Geoid for Use in FAST Survey
. With your office computer, download the desired geoid as explained in Downloading a Geoid to your Computer and Receiver.
. From the computer's task bar, select Start>All Programs>Ashtech> Geoids.
. Select File>Open. The program opens directly the folder containing all the downloaded geoids.
. Choose one and click Open.
. Select File>Save, select "GSF File (*.gsf)"as the new file format, name the file and click Save. By default, the resulting GSF file is saved to the same folder on the computer.
. Copy the resulting GSF file to the ...\FAST Survey\Data\ folder on the receiver, using Microsoft ActiveSync.
. In FAST Survey, open the Localization function (Equip>Localizat..., GPS tab). Do the following:
- Tap on the Geoid File button
- Select the geoid file from the ...\Data\ folder.
- Tap on the green tick button. The use of the geoid in FAST Survey is now effective.
Reminder: To reject the use of a geoid, go back to Equip>Localizat..., GPS tab, tap on the Geoid File button and then tap on the red cross button.
Updated April 28, 2020
GEOID